Why You May Need to Make a Jammer?
A Wi-Fi jammer device interferes with the wireless signals utilized through a Wi-Fi network. A Wi-Fi jammer device interferes with the wireless signals utilized through a Wi-Fi network. These jammers are designed to block users’ access to a network. They are functional and practical devices that enable you to stop internet traffic. Wireless jammers intentionally disrupt authorized Wi-Fi signals by emitting strong radio energy at the same frequencies. By doing so, they disable devices and prevent Wi-Fi connections by creating a frequency that interferes with connecting networks. In this article, we are going to see how to make a jammer. In this article, we are going to see how to make a jammer.
Applications of Jammers
In the realm of wireless communication, signal jammers are highly effective tools utilized to disrupt the connection between a wireless device and its access point. When activated, these jammers work by blocking devices within their range from accessing internet services. As wireless devices exchange data packets at specific frequencies on a wireless network, signal jammers are designed to transmit noise to interfere with the frequency band where wireless devices operate, effectively rendering them inoperable.
It’s worth noting that signal jammers are portable and handheld devices, meaning they can be easily transported and used in a wide variety of settings. With a range of approximately 15 meters, they are relatively inexpensive and widely used for both security and personal privacy reasons. As such, there are various types of jammers available in the market, including mobile jammers and Wi-Fi jammers, among others. Overall, signal jammers are a versatile and powerful tool for anyone looking to safeguard their privacy and security in a wireless world.
What is a Wi-Fi Jammer?
A Wi-Fi jammer is a wireless device that is designed to interfere with the normal functioning of a Wi-Fi network by transmitting a powerful signal at the same frequency as the network. The aim is to prevent authorized devices from accessing the network or causing existing connections to become unstable or slow.
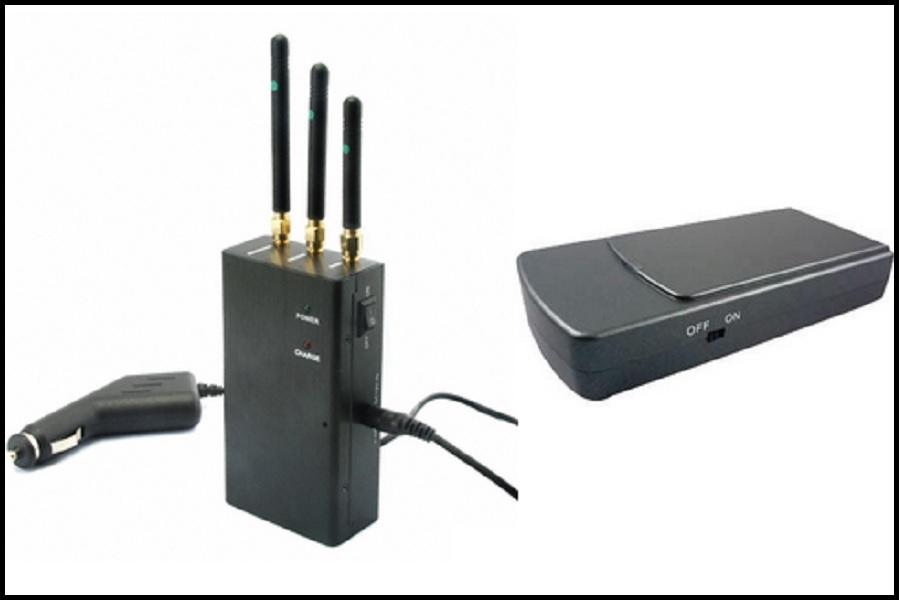
The range of a Wi-Fi jammer can vary depending on several factors such as the type of jammer used, the frequency of the signal, and the strength of the signal being transmitted. In general, a Wi-Fi jammer can cover a radius of up to 30 meters from its source point, making it an effective tool for disrupting wireless communication in a targeted area.
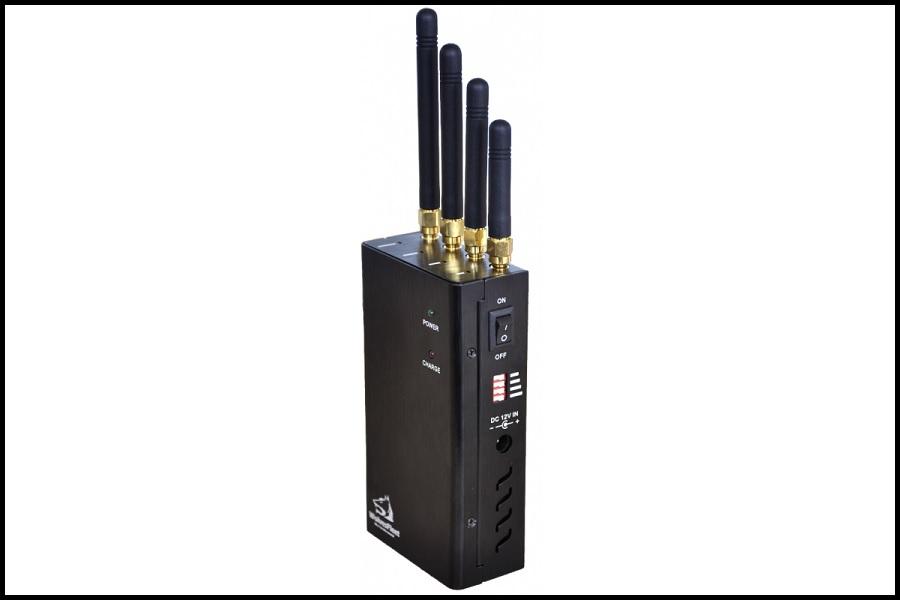
Specifications of a Wi-Fi Jammer
The specifications of Wi-Fi jammers tend to differ based on the manufacturer. It is crucial to be aware of these variations to make an informed decision when purchasing one. Below are the specifications of a Wi-Fi jammer:
- Internal modulation: FM Hopping frequency
- Its power supply: 12VDC
- The source of the signal: DDS and PLL synthesized
- Battery: Li-Polymer
- Antenna: omnidirectional
- One or two modules for each unit
- Remote control through SNMP-controlled parameters:
- Air interface standards are – Bluetooth and Wi-Fi
- It has 260mm x 10mm x 39mm dimensions
- It has a waterproof design
- Its weight is 0.8Kg approximately
- Output power is EIRP 8W
- Its operating temperature ranges from -20ºC – +65ºC
- The interface standard used is 802.11 a/b/g
- Its humidity ranges from 5% – 80%
How Wi-Fi Jammers Work?
Wireless signal jammers function by emitting a frequency that blocks Wi-Fi connections and disables various devices connected to different networks, such as 3G, 4G, cordless Wi-Fi, or GPRS networks. These jammers are specifically designed to assist individuals in solving problems that arise from cell phones, Wi-Fi networks, and more. Each signal jammer operates within a specific frequency range, and a Wi-Fi jammer operates within the range of 2.4 GHz to 2.5 GHz, effectively blocking Wi-Fi signals. These jammers are commonly utilized by network companies that handle sensitive data to prevent leaks.

How to Detect Wi-Fi Jammers?
To detect Wi-Fi jammers, there are several methods you can try such as scanning the Wi-Fi app, physically inspecting the area, using a spectrum analyzer, or reviewing WAP logs. Once a Wi-Fi jammer is detected, there are various techniques you can use to reduce its effects.
These techniques include changing the frequency or channel of your wireless network by using a directional antenna, a signal-blocking device, or a WIPS. If the Wi-Fi jammers are causing significant disturbance to your wireless network, you can also contact law enforcement for assistance.
How to Make a Wi-Fi Jammer?
In this guide, we will discuss how to create a Wi-Fi jammer using an ESP8266. The purpose of this jammer is to scan for various Wi-Fi devices, block specific connections, create multiple networks, and confuse Wi-Fi scanners. It is used to demonstrate the vulnerability of Wi-Fi network routers or hotspots. This DIY Wi-Fi jammer is compact and portable, and can be powered by a power bank. It works by performing a deauth attack to disrupt signals. With this tiny esp8266 board, you can become a Wi-Fi hacker without needing anyone’s password. We will provide more detailed steps below.
Step 1 of how to make a jammer: components
If you’re planning on building a jammer, you’ll need to gather a few components first. Specifically, you’ll require an ESP8266-1 from DFRobot FireBeetle, a LiPo Battery or power bank to power the device, a PCB to hold everything together, and Arduino code to program the jammer. Once you have all of these items, you can proceed with building your jammer.

Step 2: Need to Download Arduino IDE
To get started with the Arduino IDE, visit the Arduino.cc website and download it for free. Once downloaded, install and open the IDE. From there, navigate to the File option and select Preferences. Next, add the esp8266 packages to the extra board’s manager URLs. After that, go to Tools, select Board, and then Boards Manager. Search for esp8266 and install the board. Finally, restart the IDE and you’re ready to go.
Step 3 of how to make a jammer: Module Coding
To download the Release Version 1.5 repository from GitHub, you should first download the folder and locate the proper path to open the file in Arduino IDE. After opening the file, go to Tools and select the appropriate board you’re using. Then, open Tools again and choose the correct communication port under Port. Finally, click the upload button and wait for the tab to alert you that the upload is complete. Once the device is ready, you can start using it.
Step 4: Connect the Module
To use the module, connect it to a power source using either a micro USB connector or a battery. Next, connect the module to a Wi-Fi network named “pwned.” To do this, use a phone or laptop and enter the secret word “deauther” when prompted.
To control the device, start by connecting it and then opening a browser. Navigate to the IP address 192.168.4.1, which is the main website for controlling everything. From there, select the Wi-Fi connection you want to attack. Click on the attack tab and choose the type of attack you wish to carry out. The device should work as expected after these steps.

You Need a Reliable Jammer Maker
As was said, jammers are used to block communications in different media. One of the most important applications of jammers is hacking digital utility meters. It is done in a bid to reduce the utility bills. In doing so, you can select and purchase your desired product from Full Jammer. All the process, including payment and delivery will be secured, so you will have no worries for your privacy.


fulljammer
This is a paragraph.It is justify aligned. It gets really mad when people associate it with Justin Timberlake. Typically, justified is pretty straight laced. It likes everything to be in its place and not all cattywampus like the rest of the aligns. I am not saying that makes it better than the rest of the aligns, but it does tend to put off more of an elitist attitude.

Recent Comments